New Features Overview
Daylight’s updates focus on streamlining workflows for text analytics projects, especially those leveraging agentic insights. These changes reduce friction in data collection, cleanup, and exploration, making it easier for users to handle scraped review data and derive actionable insights.
Recent Changes
These enhancements position your platform as more agent-friendly, saving time on prep and elevating insights for clients in retail, product feedback, or market analysis.
| Saved Scraper Links | Metadata Field Editing | Metadata Value Editing |
| Users can now browse the web, save review URLs, and download them later. This eliminates the hassle of manual file uploads and lets you recreate projects after errors. | In Daylight, users may merge fields and values across sources (e.g., combining | Users can merge duplicate or inconsistent metadata values within a field (for example, standardizing values like 1 year and Apple One (1) Year Limited Warranty). |
 |  |
Scraper Links
Online reviews can be helpful. Users use scrapers to pull text directly from public URLs into Luminoso and build datasets from live sources such as reviews, articles, or forums. Scraper URLs can also be downloaded as a .txt file, allowing the same sources to be re-uploaded to recreate a project or troubleshoot workflows if a scrape fails. This flexibility is especially helpful for exploratory workflows where sources evolve over time or need to be revisited.
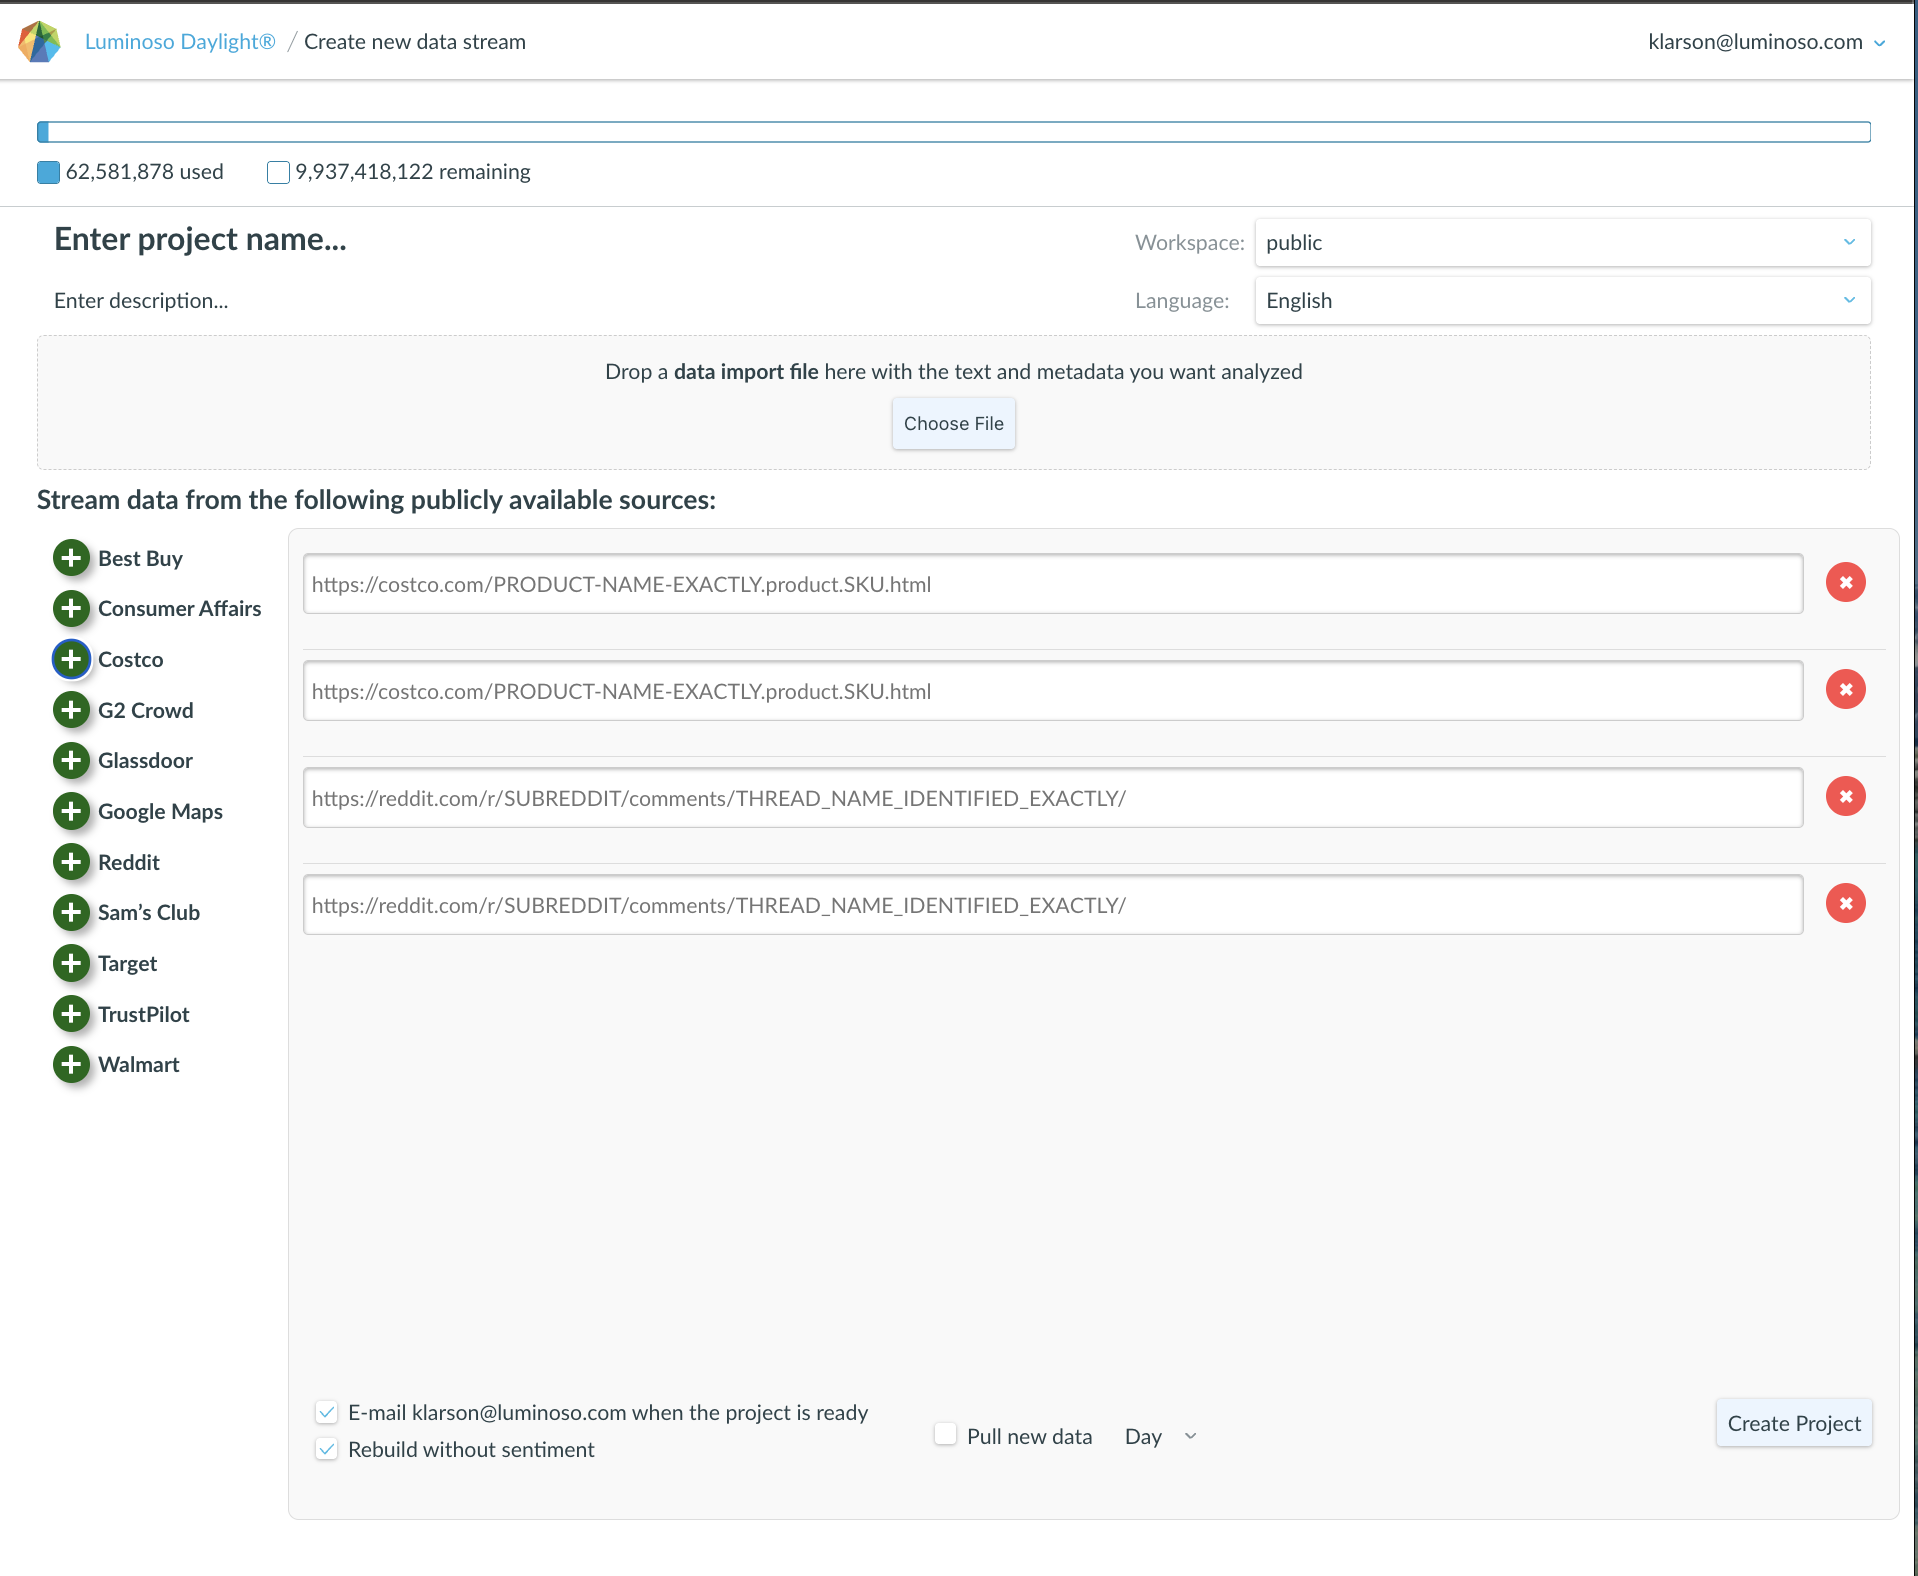
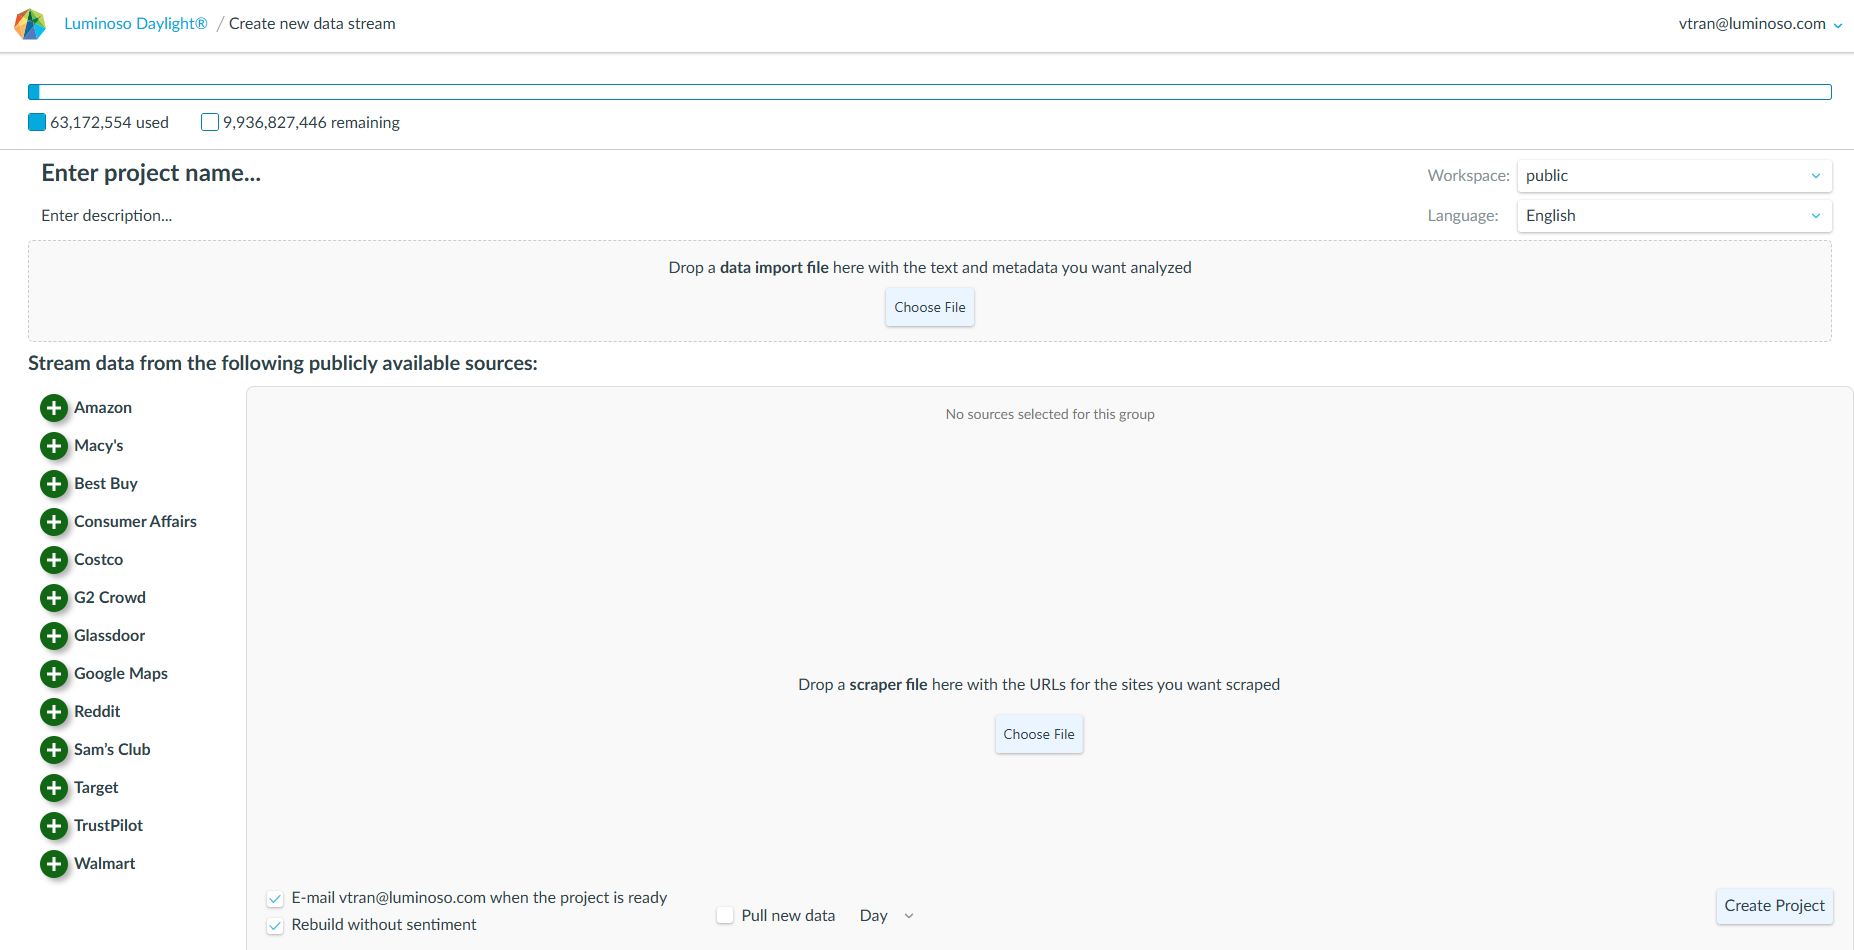
How to create a project from public URLs
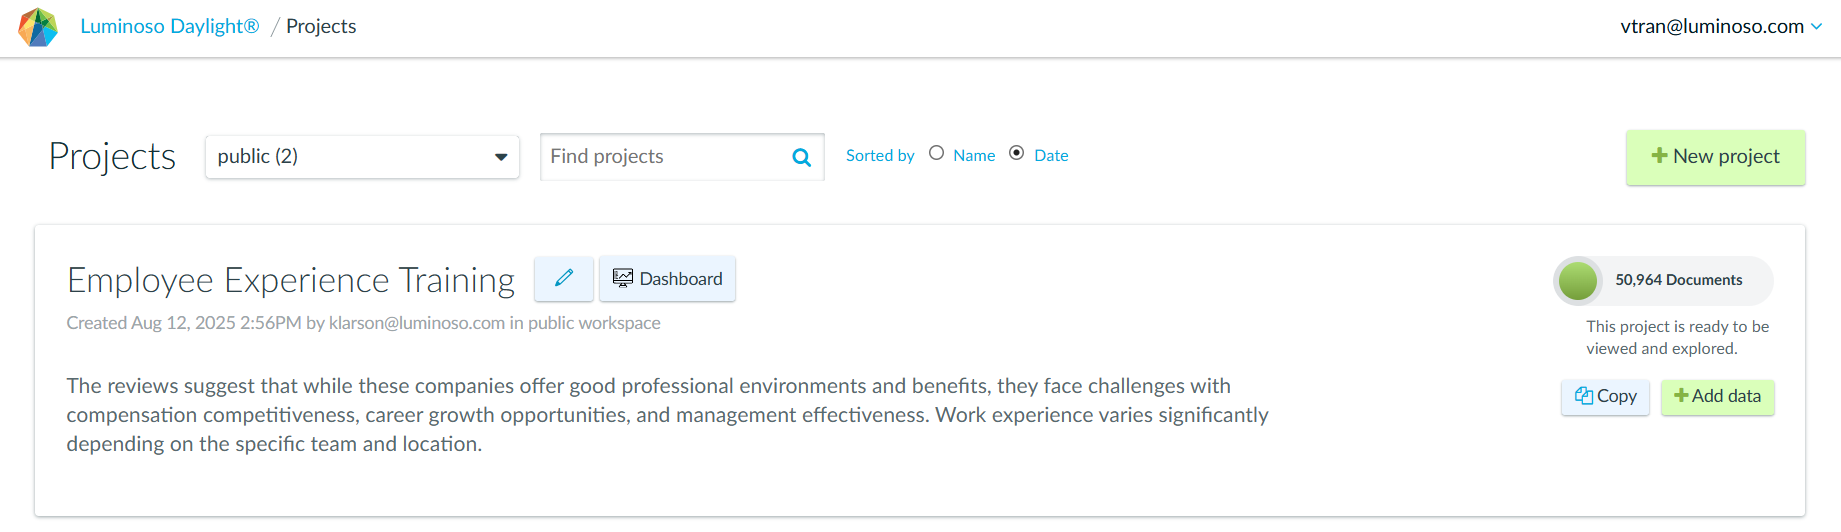
- In Daylight’s Projects list, click “+New project“.
- On the Create new data stream page, select one or more publicly available source types provided.
- Navigate to the external site and copy the URL of the page containing the desired content.
- Paste the URL into the corresponding source field.
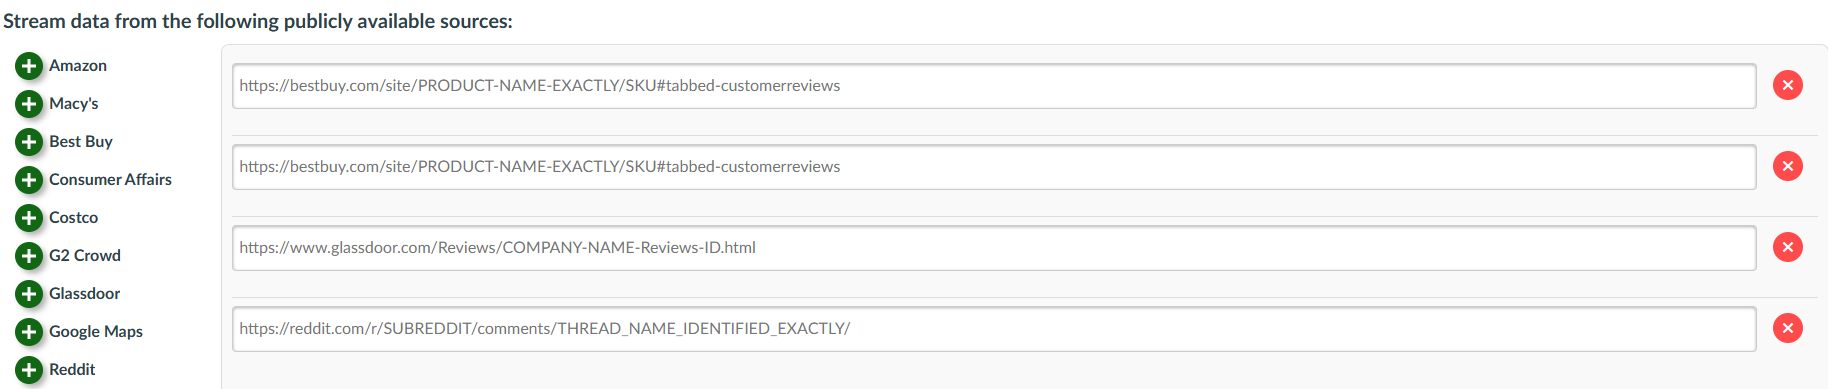
- To add another link, click the
 plus icon for the corresponding source to create another input field, then paste the next URL.
 - (New!) Download the list of scraper links as a
.txtfile. This file can be re-uploaded in the same location later to reuse the same sources or recreate the project.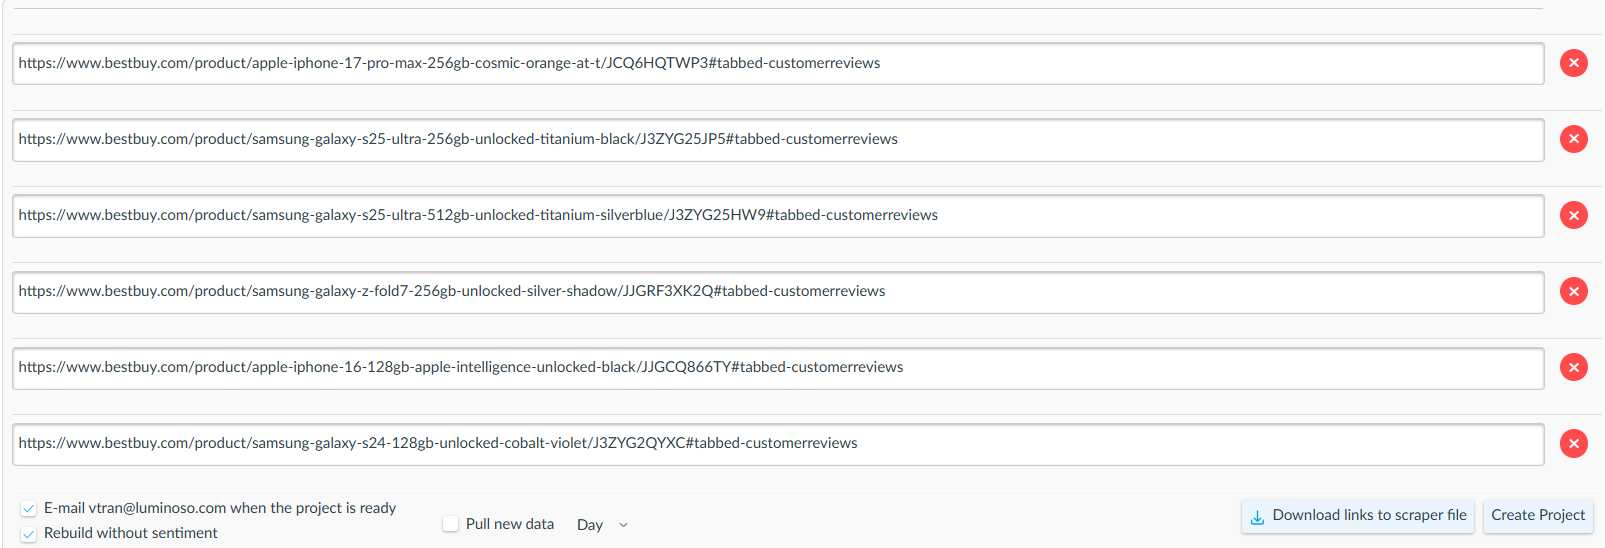
- Click “Create Project” to complete the scrape.
Metadata Editing
Metadata often needs cleanup after upload, especially when data comes from multiple sources or scrapers. Users typically edit metadata to:
- Finish data cleaning post-upload
- Support privacy needs
- Standardize fields across time or sources
- Improve filtering and comparisons
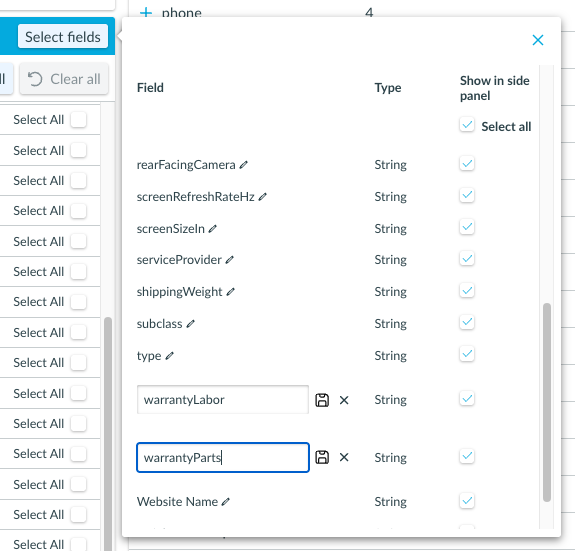
Merge metadata fields
Use this when two fields represent the same concept (example: warrantyLabor_StylewarrantyParts
Steps
- In a Daylight project, open any primary feature (not Dashboard).
- Go to the
 “Filters” tab.
 - Open “Select Fields“.

- Click the
 pencil icon to edit metadata field titles.
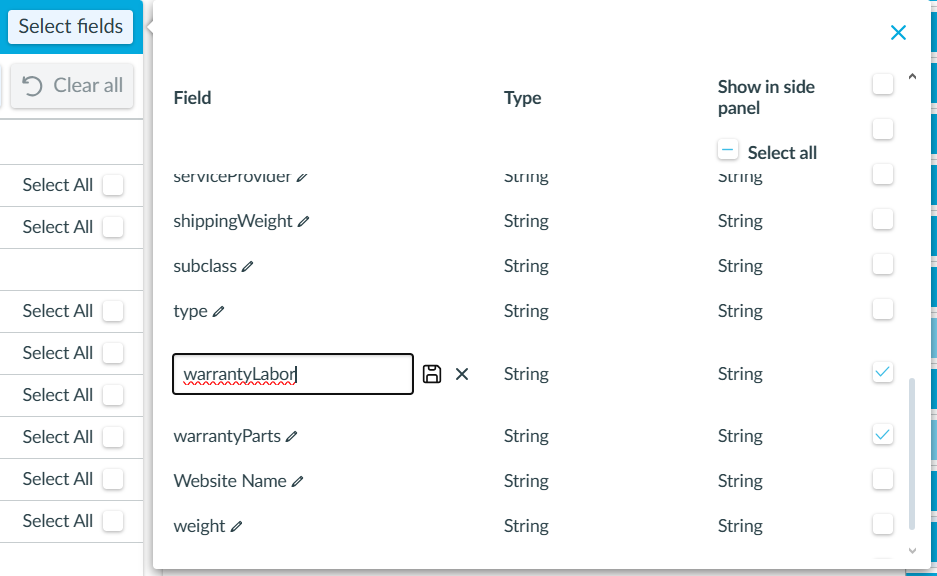
- Rename the fields so they all have the same title. This triggers field consolidation.
- Click
 Save.
Save. - If the renamed fields match, a warning/confirmation message appears showing:
- Before: two field titles
warrantyLabor,warrantyPartsand their values - After: one field title
Warrantywith the combined value set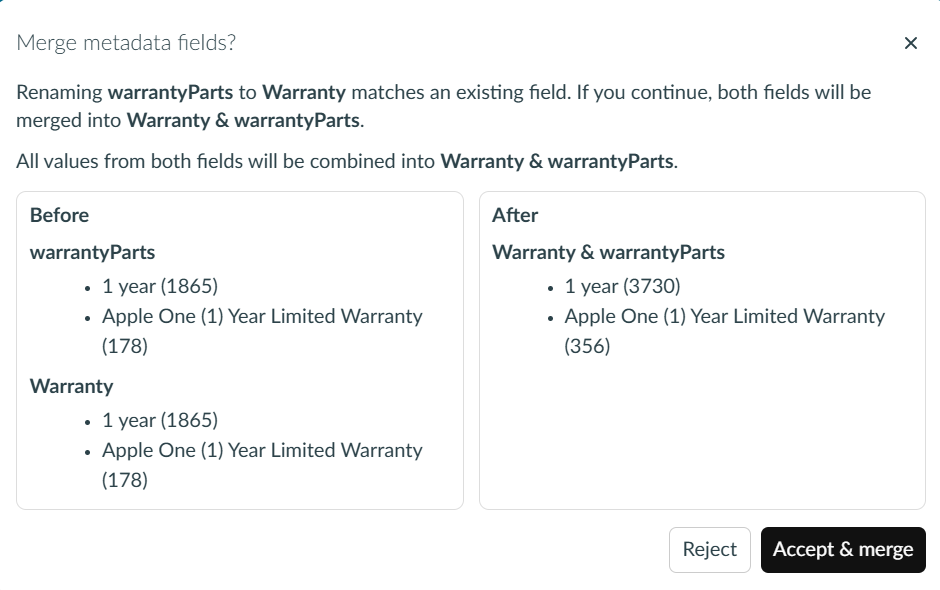
- Before: two field titles
- “Accept & merge” to apply the changes, or reject to keep fields separate.
Merge metadata values
Similar to merging metadata fields, use this after field consolidation when redundant values remain (example: 1 year and Apple One (1) Year Limited Warranty that should roll up together).
Steps
- In a Daylight project, open any primary feature (not Dashboard).
- Go to the “Filters” tab.
- Expand the field to view its values (a dropdown caret should show the value list).
- Click the
 pencil icon next to a value to rename it.
 - Rename the value to match the target value exactly (or rename multiple values to the same final value).
- Example: standardize both values to
1 year.
- Example: standardize both values to
- Click Save.
- Values with the same name merge after saving.