Note: Only Organization Admins and Workspace Admins can view this tab. Only Organization Admins can make changes.
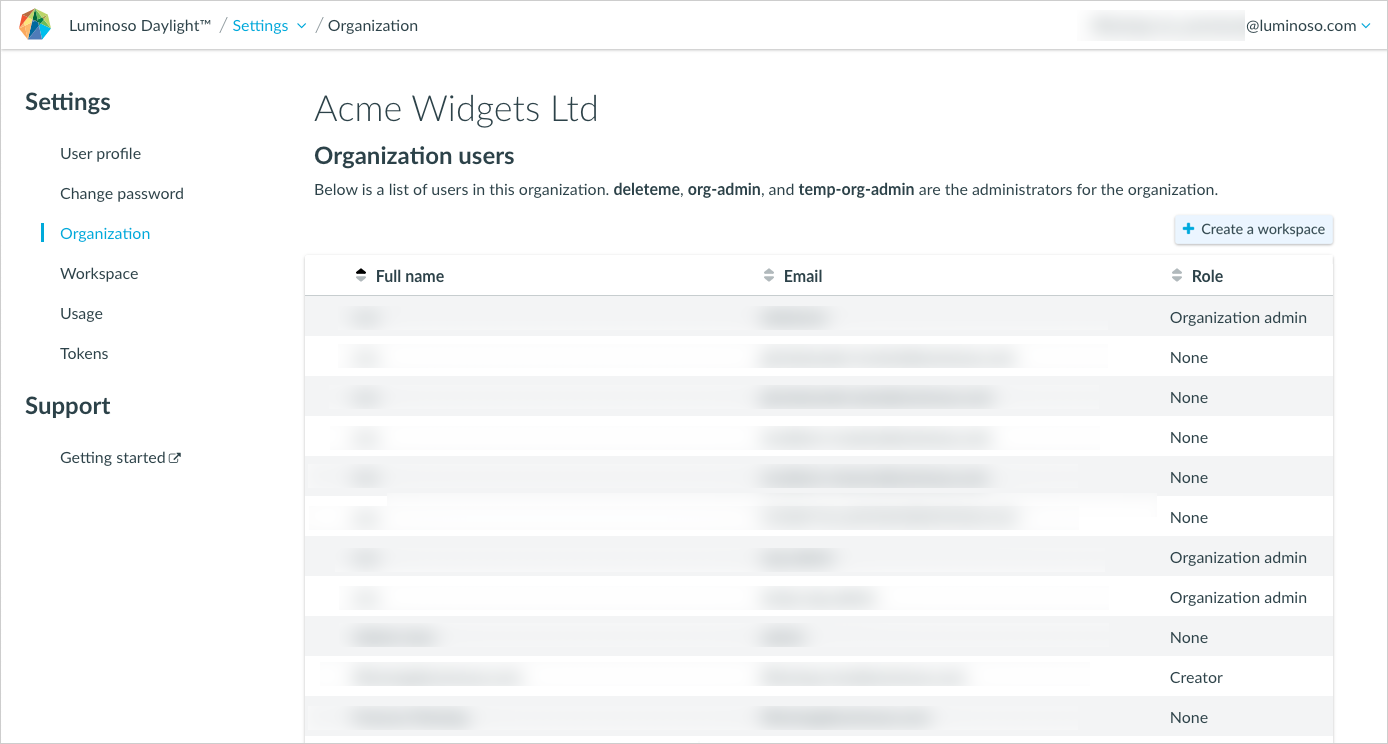
If you have the Organization Admin role, use the Organization tab to view and manage the the users in your organization and their roles. You can also create workspaces here. Workspace Admins can also view this tab.

When you open the Organization tab, you immediately see the organization name and the administrators for the organization. If you’re an Organization Admin, click edit to update your organization’s name and then click Save or Cancel to complete your action.
Any role that you update on the Organization tab will provide the same permissions across to the user universally across workspaces. As a best practice, assign roles at the workplace level. This helps keep roles distinct and separate. Sort the user list using the arrows next to column headings.
To edit users on the Organization tab
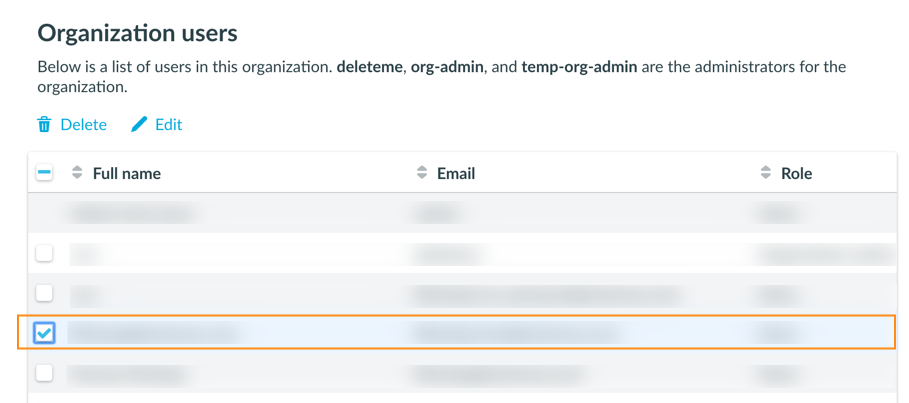
- Locate the user or users you want to edit and select them by clicking anywhere in their row. The row turns blue and a check mark appears by the user’s full name.

- Click Delete to delete the selected users from the organization.
Note: When you delete a user from an organization, they are also removed from all workspaces. - Click Edit to update the selected users’ roles. A window appears where you edit roles.
- Click Save or Exit to close.
To create a workspace
- Make sure you’re on the Organization tab and click Create a workspace. A Create a new workspace window opens.
- Enter a name for your workspace and click Create workspace. The window displays a success message.
- Open the new workspace using the link or by navigating to the Workspace tab in the Settings menu.

